This is the second post in a series teaching the basics of WordPress from a client’s perspective.
At King Design, we like to give the power to our clients by giving them the ability to edit their sites after they’ve been built. We mainly use WordPress to accomplish this goal. For someone not used to using a Content Management System (CMS), WordPress can be a little confusing. In my previous article I explained how to log in as well as the main Dashboard and sidebar navigation. For this article, I’ll dive more into actually editing pages that have posts and custom post types.
The Basic WYSIWYG Editor
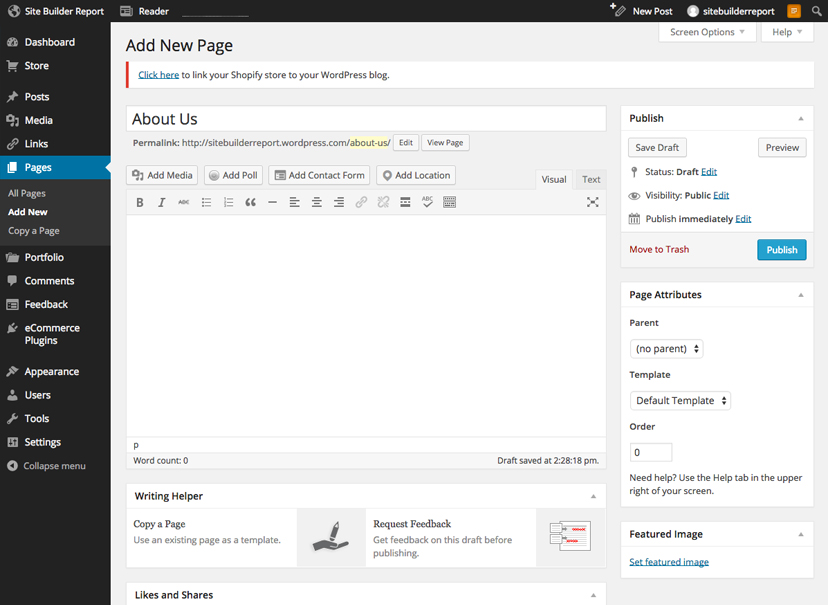
The basic text editor in WordPress looks very similar to Microsoft Word. If you’re familiar with that, you’ll understand what most of the icons represent. If not, let’s go through them briefly:
- The Add Media button lets you add media into the text editor. It can be uploaded from your computer or added from the Media library if it has already been uploaded.
- In the first row of the toolbar, you have options to bold, italicize or strikethrough text, options for bulleted and numbered lists, and text alignment.
- The quotation mark icon is the block quote feature. This is usually styled differently then the paragraph text so you can have a “call-out” section.
- The chain icons allow you to easily add or remove links to text. After you write what you want the link to say, highlight the text and click on the Insert/Edit Link button and enter in the corresponding URL.
- The “insert more” tag will most likely not be used since the posts will have already been formatted to do this for you.
- The Toolbar Toggle allows you to show/hide the second row of options.
- The first option in this row allows you to change the heading styles. Usually the page title of the page will be your Heading 1, so any headlines you add in your text will be Heading 2 – Heading 6.
- Another popular button is the clipboard icon with a T. This is the “paste as text” option. You use this when pasting content from Microsoft Word or any other text editor.
- The decrease/increase indent buttons are for use during bulleted/numbered lists.
- Also, in this row you can underline text, change text color, justify alignment, clear formatting and undo/redo.
Custom Fields
As I mentioned in my previous article, we use a plugin called Advanced Custom Fields to help us make new elements that aren’t natively built into WordPress. These elements, or components, get named and tailored to whatever that specific component is. I’ll break down the most commonly used ones and then show you them all together on a page.
Text Input

This is a basic text field that is just one line of text. It’s usually used for a name, headline, or for the label on a button.
Text Area
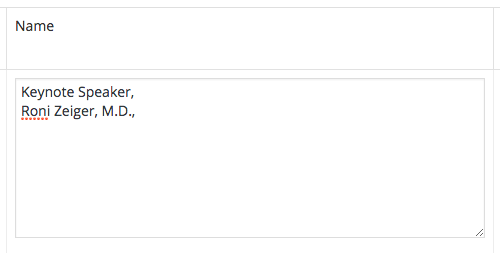
This field is very similar to the text input but allows you to have multiple lines of copy. This is mainly used for headlines that need to be broken onto two lines and doesn’t allow any formatting (if formatting is allowed, the WYSIWYG editor will be used).
Internal Link
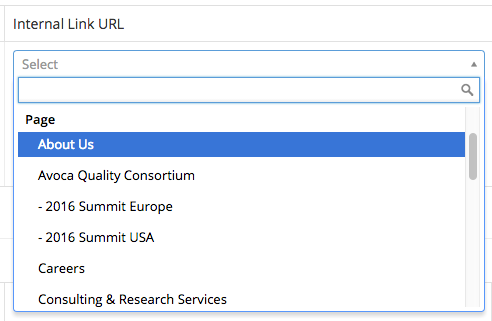
This link field is pretty handy when linking pages, posts or media that exists on the same web site. Sometimes we pair this field along with the external link so a client has the freedom to use different URLS on a button or link.
External Link

As mentioned in the last field, this link is used for linking out to a page that’s on a different website. It can be used to link to a page on the same website as well but the Internal Link, mentioned above, is easier to use.
Image Field
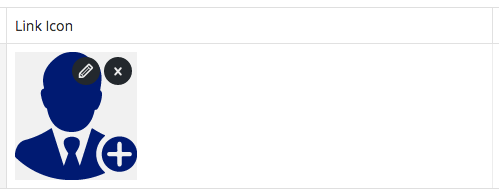
This field works exactly the same way as the Add Media button inside the WYSIWYG editor. You can upload an image from your computer or choose one from the Media Library.
Gallery
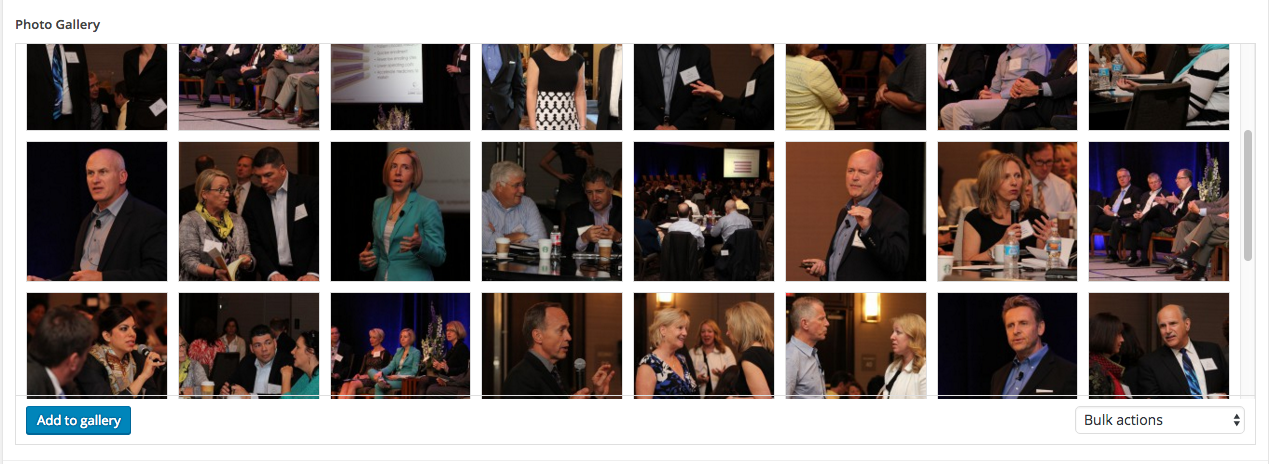
This field is pretty straight-forward. You have the ability to upload multiple images the same way as the above image field. Depending on how the developer built it in the backend, it can be a slider or lightbox gallery.
Repeater Field

The repeater field is a combination of any of the previously mentioned fields together as one, which can then be used multiple times for separate entries. We use these fields when a series of duplicate data is needed such as a list of buttons or a group of team members for example.
Putting It All Together
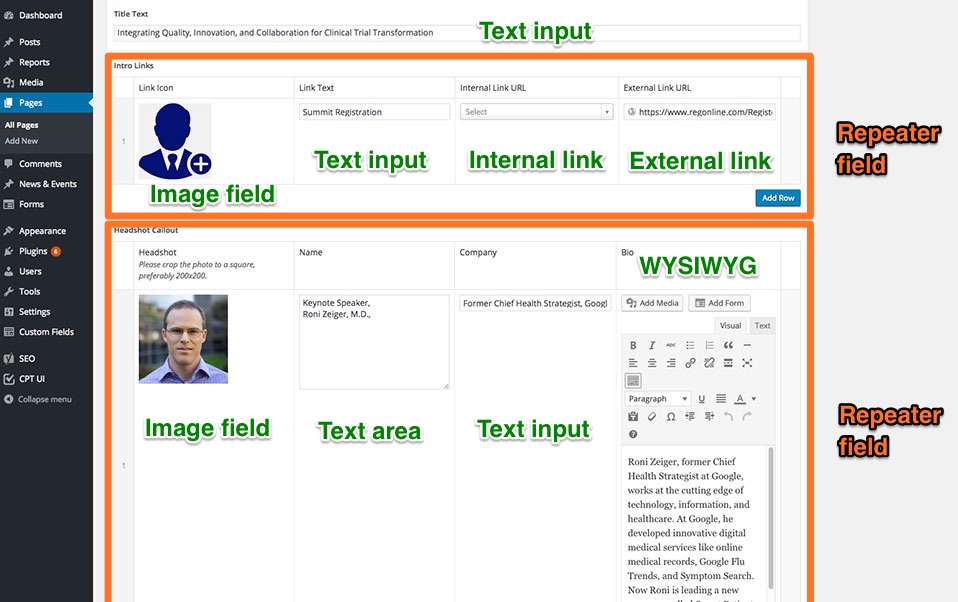
Here’s an example of what a page could look like using all of these elements. At the top is a text input being used as a headline for the section. It’s followed up by a repeater field that will list one or more links. Each link consists of an image field (used to add in an icon), a text input (the actual text on the link), and an internal or external link (choosing one will set the actual URL of the link).
After the link fields is another repeater field that will show a list of headshots. Each headshot includes the headshot image (image field), name of the person (text area), company name (text input), and a short biography (WYSIWYG editor). You’ll notice that there are also some instructions for the image field. Sometimes we add in instructions for the client for things that aren’t completely obvious when looking at the fields. In this case, we give the specifics for the image.
Same, but Different
As you can see, although every page may be completely different, the elements that make up that page are basically the same. Once you understand the purpose for each one, you can better understand how the page is laid out. I hope this breakdown will help speed up your content editing time. If you have any questions or would like me to talk about something else WordPress-related, let me know in the comments below.
